
“Hmpf.”
Has anyone else been listening to the “Hipster Picnic Soundtrack” I have been constructing strip-by-strip? We are 36 songs deep and this soundtrack is going strong! (Sorry Chris for the the RENT soundtrack inclusion – it just fit.) The idea of matching each individual scene up with a song has been really fun. Sometimes I want to blow it off, but days like today (where I am listening to old Alien Ant Farm songs) I am totally pleased with the construction of the soundtrack. Check it out for yourself. I have it available on Spotify AND on youtube.
This page also took a while because I finally wanted to share the process I am constructing Hipster Picnic pages with, step by step. I sometimes am going to gloss over the specific steps in each section of the process. If anyone is interested in getting more details on how certain things are done let me know in the comments. Check the walkthrough out below.
-Patrick
1. The Script
I work on my script using Google Documents so that Rachel, my editor from Storyforge Productions, and I can edit the story as I am working on it.
2. Reference/Layout
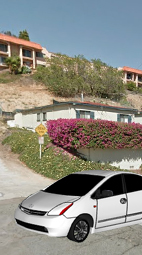
For this specific page I really needed to construct some reference photography because of the strange camera angles of panels one and three. For panel 1 I went to the street I used to live on and pulled a screenshot from the google street view. Then I hopped on over to the google sketchup warehouse to grab a screenshot of a prius at the correct angle. Trick: if you click “view in webgl-viewer” on any object you can move the camera within the webpage to the right view of the object without needing to load Google sketchup. I took that screenshot of the prius and imposed in on the google maps shot and roughly placed them into the size of the panel I was going to do.
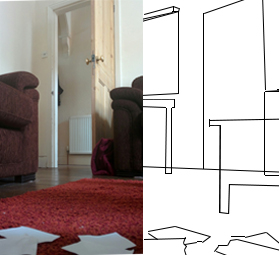
For panel three I actually went downstairs, in my house, and staged a shot for the comic with my phone and some ripped pieces of paper. I then brought it into photoshop and outlined the major objects that would be appearing in the actual comic panel.
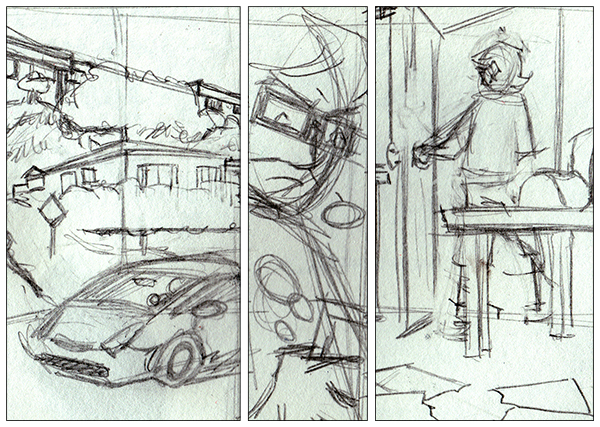
3. Thumbnails
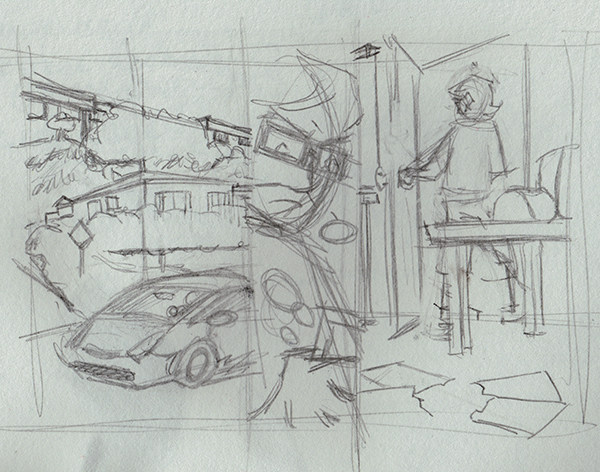
This is actually the more “in-depth” thumbnails I did for this page, where I worked off of the reference photos. After I drew this thumbnail at half size I blew it up and laid it out in a page template that I traced for my pencils with a lightbox at my drafting table.
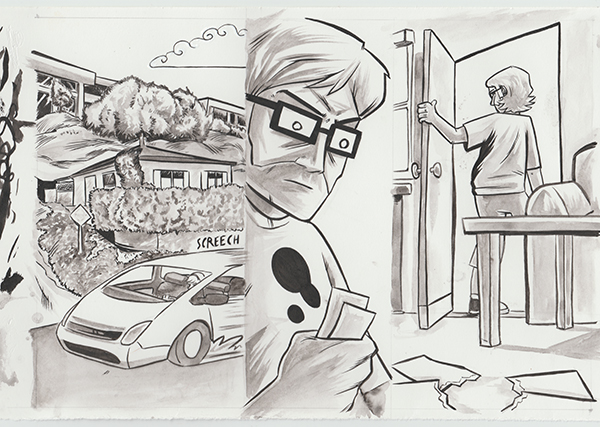
4. Inks
After tracing my pencils I conduct the tedious task of inking the page of art. I make sure to scan this separately than the next phase of watercoloring because I use this as a clean black and white layer in photoshop.

5. Watercolors
For the watercolors I take my time and add all of the shadows that are going to appear in the final page with black watercolor. I then scan this and save it using a different file.
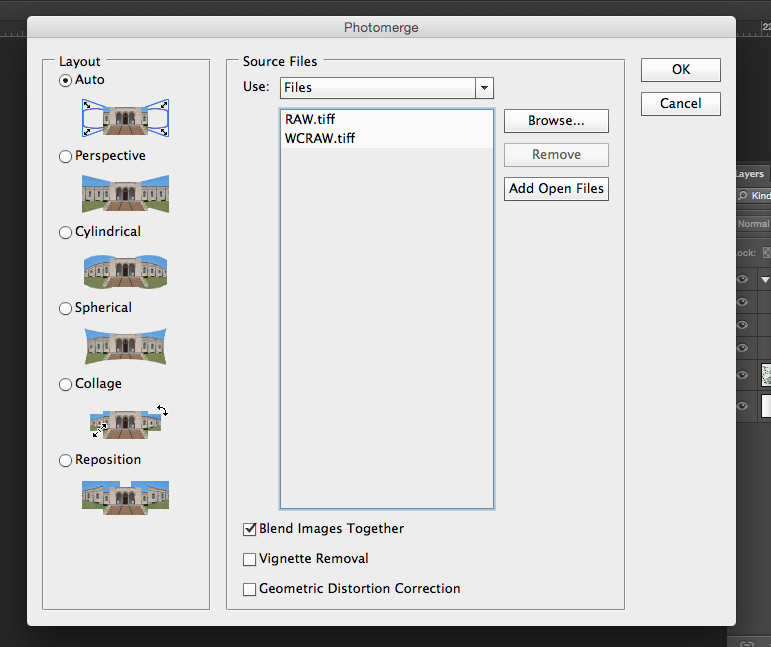
6. Photomerge
This is BY-FAR the coolest part of my process, where I take the scanned inks and scanned watercolors and use the Automate>Photomerge function in photoshop to line up the inks with the watercolors. This function was designed to be used for panoramic photos or stitching together larger photos that have been scanned in pieces. I figured out that it will actually line up the watercolors and the inks on separate layers so that I can deal with them differently. Tip: make sure you delete the layer masks after the photomerge process is complete.
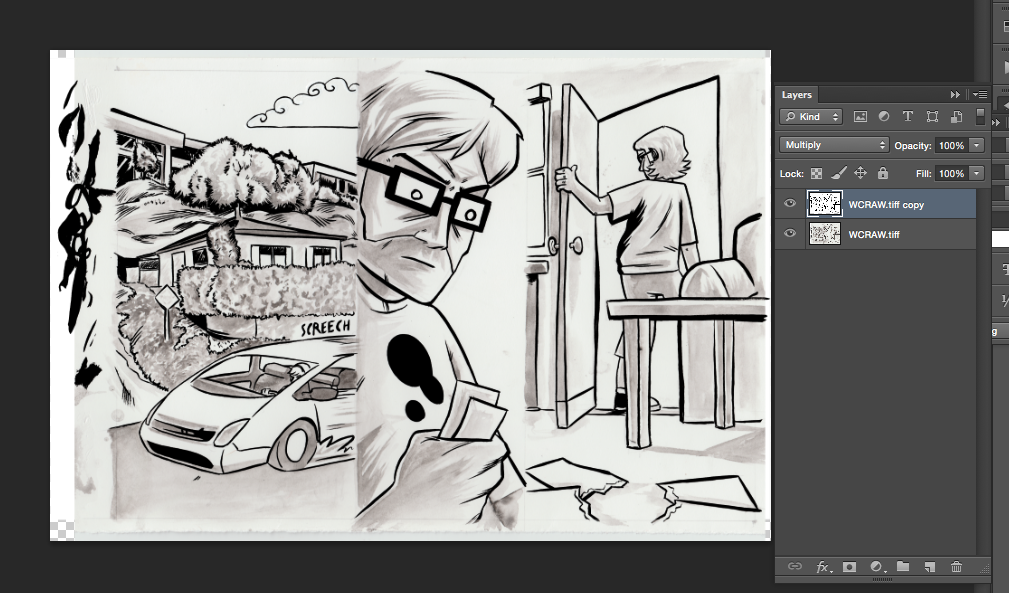
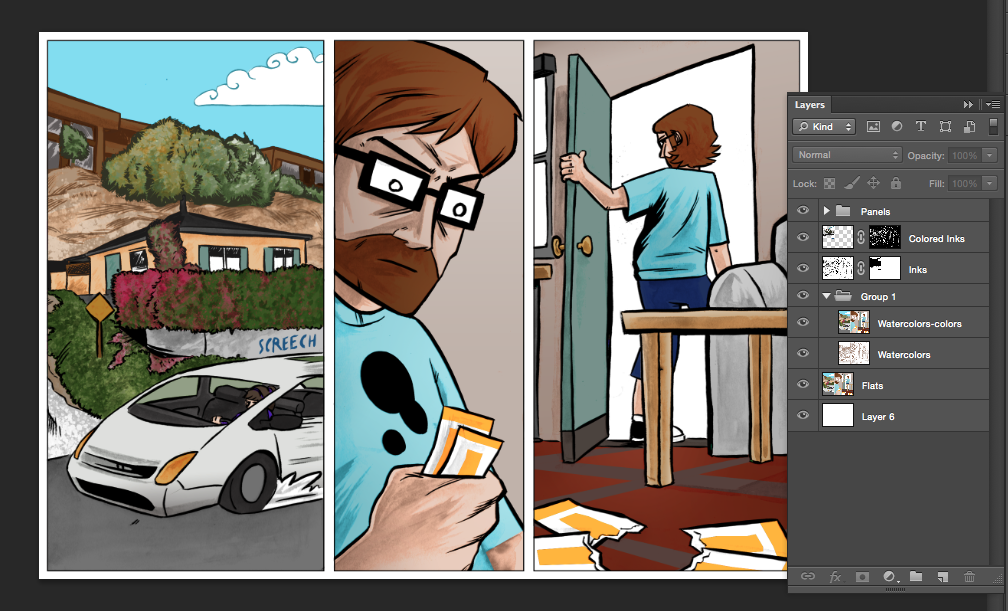
7. Corrections
In this phase I clean up the ink layer using levels and threshold and then use the multiply blend mode so I can see the watercolors underneath. I will then group these layers together so that I can transfer them into the panel template I have generated.
8. Panels
In the panels template I have created I can actually ensure that the art is the correct size in comparison to all the other artwork in the Hipster Picnic series as well as create perfect panel boundaries. This actually saves me time when I am working on the original art because I don’t have to measure and rule the panels.

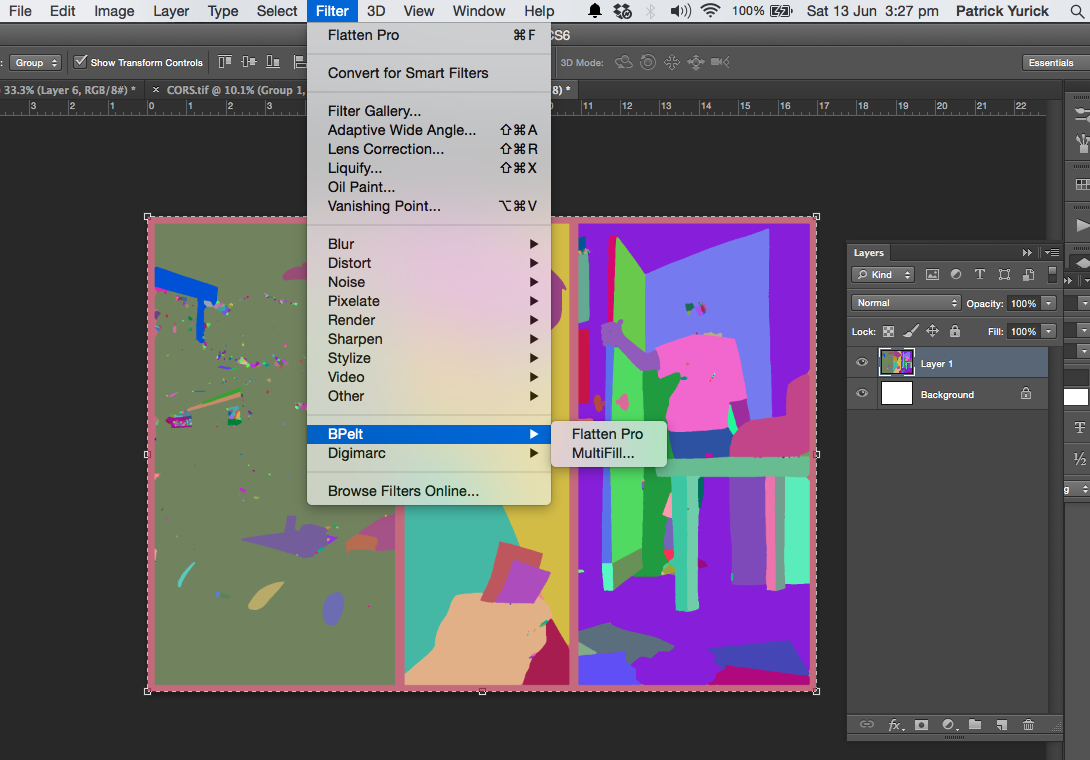
9. Flat Coloring With The Bpelt Filter
I will temporarily merge the black and white layers together so that I can use the Bpelt filter to create flat colors for the page. (Tutorial for how Bpelt works). This is one of the coolest things since sliced bread because it can help ENSURE you have a flat color base below your inks.
10. Coloring With Swatches
Besides the inking and watercolors, this step takes the longest. I go through and properly color all of the individual shapes. This usually involves the lasso tool where bpelt failed to work. I also have a handy set of swatches so that I can make sure all of my characters are colored correctly.

11. Colors
After all the colors are flatted in I do a lot of little things to make sure that my layers are all playing nice together to produce the coloring effect I want for the final page.
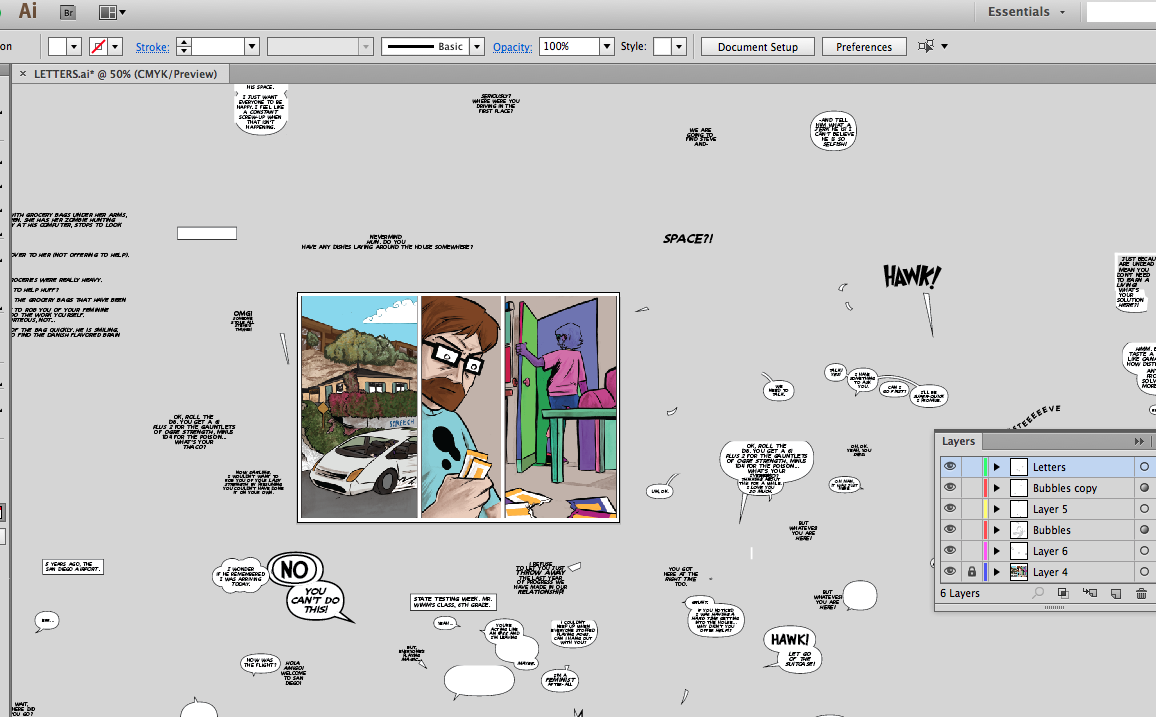
12. Lettering
I then open my handy dandy Adobe Illustrator lettering template and letter the comic.
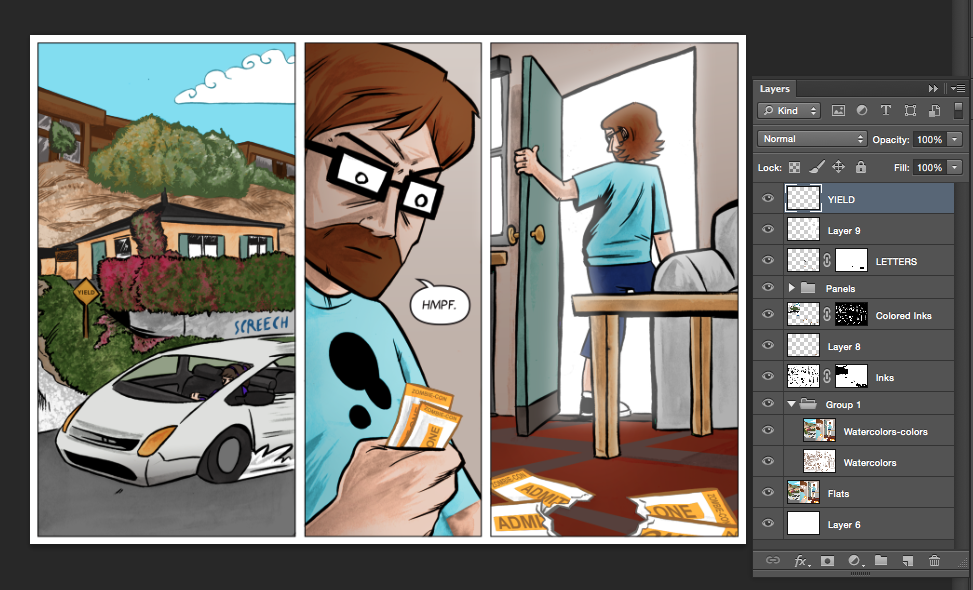
13. Finished
By the time I have looked at the page in illustrator I usually notice a couple more things that need to be done to finish the page, so I add them. Then I save it for web at the correct size for this site, then post it.
Song Of The Day:
“Movies” by Alien Ant Farm


Your process breakdown is very cool. I need to do one for how I make Rancidville. I think above all else – seeing someones process and knowing that there are SO many ways to do this helps people overcome the fear of “what if I’m doing it wrong” syndrome.
Love your comic!!!!
I would love to see that breakdown John. I am in love with the fact that there are so many ways to make a comic. Gotta do it the best way for you.